Resizing
Resizing in Photoshop can help you print your images in standard photo sizes, resize and preserve the high quality of digital photos, and enlarge small images to a poster size.
Resizing to a Specific Size
To resize your image to a preset size, follow the steps below:
- 1.In the main menu, go to File > New.
- 2.In the New dialog box, click on the Document Type dropdown menu.You will see several preset sizes, such as Web, Photo, and U.S Paper. Remember that 72 ppi is ine for online images, but a ppi of 150-300 ppi is better for printed images. (Figure 10).
- 3.Choose the size that you wish and click OK.
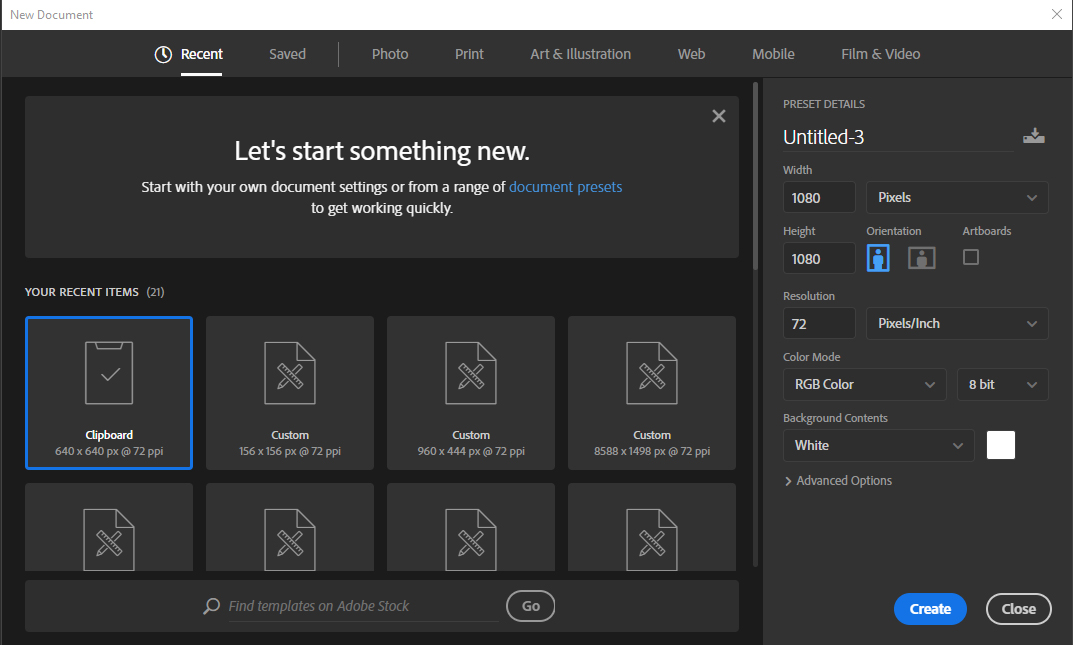 Figure 10: Preset size in the New dialog box
NOTE: All the preset sizes are in portrait orientation. If you wish to resize an image with the landscape orientation, you need to create your own preset. To create your own size, do the following:
- 1. Type in the values for Width and Height, for example 2000 x 2000.
- 2. Type in your desired resolution (300 ppi for high quality prints, and 72 ppi is good for web images).
- 3.Click the Save Preset button.
Resizing Digital Photos
Digital photos usually have large dimensions but low resolution, 72 ppi, which affects their quality when their size is decreased or increased. When printed, the photos with the changed size will look pixilated. To resize the digital photos without loosing the quality, follow these steps:
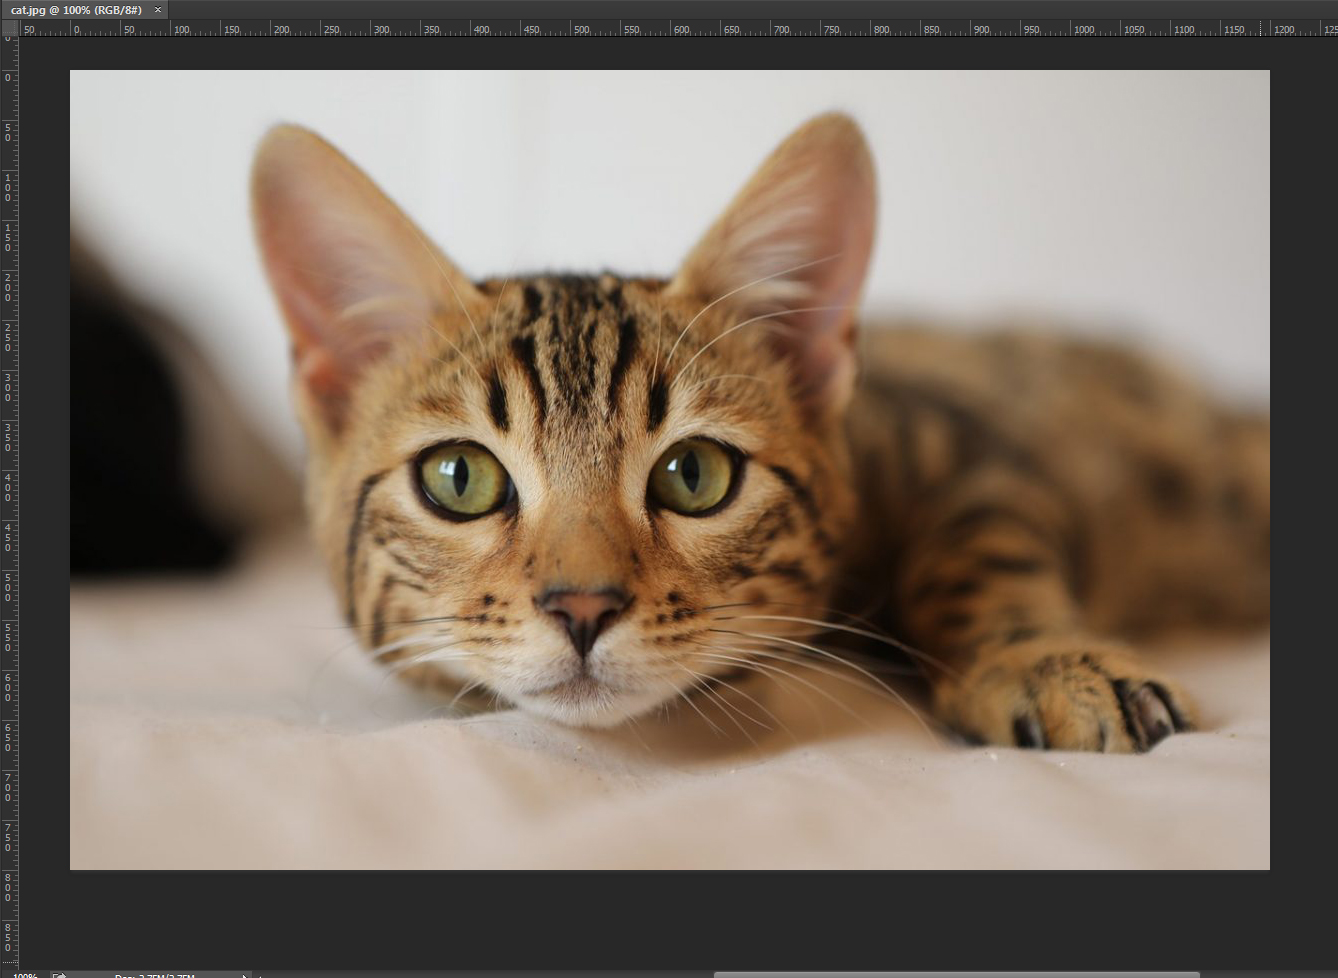 Figure 11: Dimensions of a digital photo
- 1. Open the digital photo you wish to resize.
- 2. In the main menu, go to View > Rulers. You will see the dimension of your photo (Figure 11).
- 3. In the main menu, go to Image > Image Size.
- 4. In the Image Size dialog box, uncheck the Resample Image box (Figure 12). Type in your desired resolution (anything between 150 and 300 ppi). The photo is now 4 x 2.667 inches.
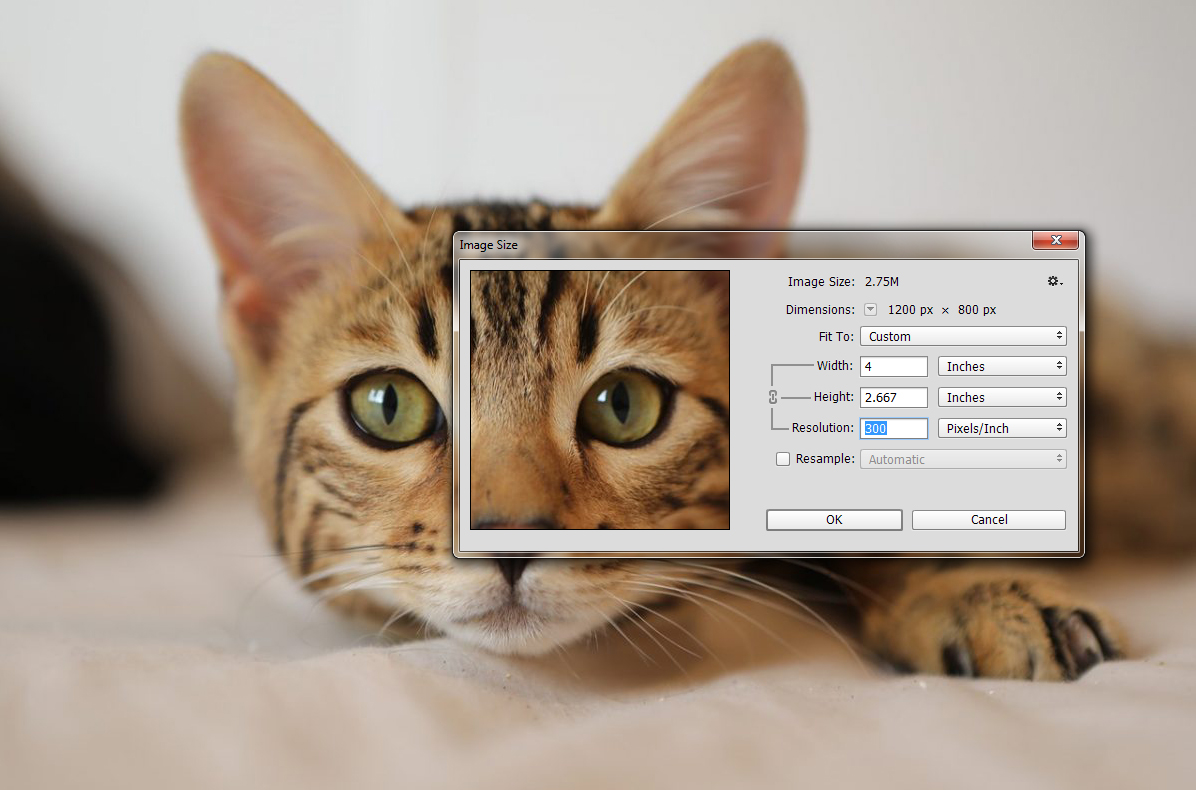 Figure 12: Changing resolution
Enlarging
If you want to make your digital photo into a poster size image, you can do it in the Image Size dialog box. However, just increasing the dimensions will make the image appear blurry and pixilated. To enlarge the image without losing the quality, follow these steps:
- 1. Open the digital image you wish to enlarge.
- 2. In the main menu, go to Image > Image Size.
- 3. In the Image Size dialog box, make sure the Resample Image box is checked and choose Bicubic Smoother from the dropdown box (Figure 13).
- 4. Change the Width and Height measurements to Percent. Type in 110. This will increase the size of the image by 10 percent (Figure 13).
- 5. Continue enlarging by 10 percent untill you are satisied with the size.
NOTE: If the Resampling box is unchecked, the dropdown menu is inaccessible. Always be sure to have it checked.
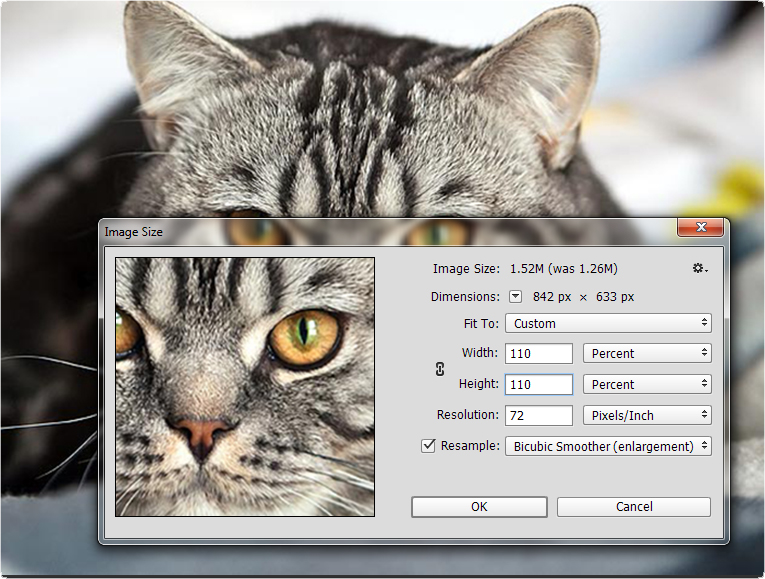 Figure 13: Increasing the size by 10 percent